Curved Text Generator
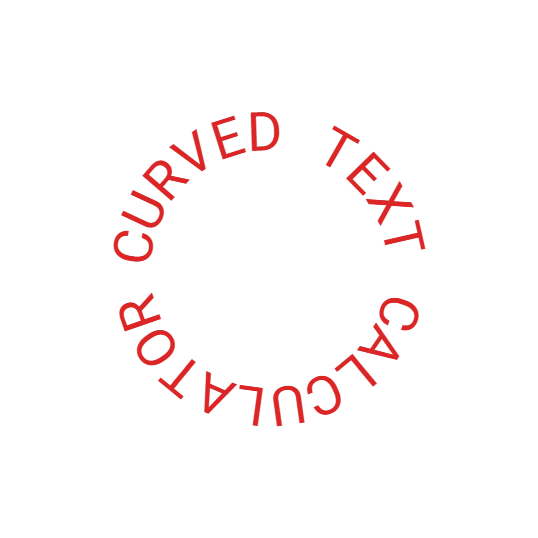
Creating circular or arched typography is a staple of badge design, logo creation, and social media graphics. A curved text generator is a specialized tool that allows you to wrap text along the arc of a circle, producing a professional, polished look that is difficult to achieve manually. This tool provides a real-time, visual interface where you can bend your words, adjust the tightness of the curve, and fine-tune the typography. It is built for graphic designers, social media managers, and small business owners who need to create elegant, custom text effects without the steep learning curve of professional vector software. The result is a clean, downloadable image or the foundational CSS for your web project.
How to Use This Curved Text Tool
Enter Your Text: Type the word or phrase you want to curve into the “Text” input field.
Select a Font: Choose from a set of bold, legible typefaces like Montserrat, Poppins, or Oswald.
Adjust the Curve: Use the “Radius” slider to control how tight or wide the arc is. A smaller radius creates a tighter curve.
Set the Direction: Choose whether the text should curve in a Clockwise or Counter direction.
Apply a Preset: Quickly switch between common layouts like “Top Arc,” “Bottom Arc,” or “Full Circle.”
Download Your Design: Click “Download PNG” to save your curved text with a transparent background, ready to be placed on any graphic.
How the Curved Text Generator Works
This tool uses the HTML5 Canvas API to render text along a mathematical path. It does not use traditional CSS or SVG text elements. Instead, it draws each character individually onto a canvas, calculating its position and rotation based on your settings.
Core Logic:
The generator breaks the input string into individual characters. It then positions and rotates each character along the circumference of an invisible circle whose radius you control.
The primary mapping is as follows:
Text Input → This string is split into an array of characters (chars).
Font Select & Size Slider → These set the ctx.font property of the canvas, directly controlling the style and size of each drawn character.
Radius Slider (80-500) → This integer defines the radius of the invisible circle the text will follow.
Rotation Slider (0-360) → This value, in degrees, is converted to radians and used as an offset for the starting angle of the text.
Text Color → Sets the ctx.fillStyle property.
Direction Select → A multiplier of 1 (Clockwise) or -1 (Counter) that determines the order in which characters are placed along the arc.
The Character Placement Formula:
Measure: The canvas measures the width of each character to calculate the total width of the text.
Calculate Total Angle: totalAngle = (totalWidth / radius) * 1.15. The 1.15 is a spacing factor that adds a slight gap between characters to prevent crowding.
Calculate Angle per Character: anglePerChar = totalAngle / totalChars.
Determine Start Angle: startAngle = -totalAngle / 2 + rotRad. This centers the text along the arc.
Position Each Character: For each character at index i:
angle = startAngle + (i * anglePerChar) * direction
x = centerX + radius * sin(angle)
y = centerY - radius * cos(angle)
The character is drawn at (x, y) and rotated by the angle to be tangent to the circle.
Validation and Edge Cases:
Empty Text: If the text input is empty, the function exits early and does not draw anything.
Download Logic: The “Download PNG” function re-draws the text on a new, clean canvas to ensure the final image has a transparent background, regardless of the preview area’s styling.
Presets: The preset buttons (Classic, Top Arc, Bottom Arc, Full Circle, Tight Curve) are shortcuts that set specific values for text, radius, size, and rotation, then trigger an immediate redraw.
Worked Example: Designing a Badge for a Podcast
Let’s create a circular text badge for a fictional podcast called “The Daily Byte.”
Scenario: You want the podcast name to form a circle around a central icon, a common design for podcast cover art.
Steps and Results:
Enter Text: Type THE DAILY BYTE into the text field.
Apply Preset: Click the “Full Circle” preset button. This sets the text to CIRCLE TEXT, but more importantly, it adjusts the radius to 140px and size to 26px—a great starting point for a full circle.
Adjust for Your Text: You change the text back to THE DAILY BYTE. You adjust the Radius slider to 160px to fit the longer phrase comfortably.
Refine Styling: You select the Poppins font for a modern feel and set the color to a vibrant purple (#7c3aed) to match the podcast’s branding.
Interpretation: The text now forms a complete, readable circle. The top half reads “THE DAILY” and the bottom half reads “BYTE,” creating the classic badge look. The transparent background of the downloaded image will allow you to place it directly over your podcast artwork.
Takeaway: You have created a professional-quality circular text badge in minutes, a task that would be complex and time-consuming in standard image editing software.
Frequently Asked Questions
How accurate is the curved text generator?
The generator is mathematically accurate, calculating the exact position and rotation for each character based on the circle’s geometry. The live canvas preview is a pixel-perfect representation of the image you will download.
Can I download my curved text with a transparent background?
Yes. The download function is specifically designed to re-render the text on a fresh, transparent canvas. The final PNG image will have no background, making it perfect for layering over other graphics or photos.
What causes the text to start at a different position?
The starting position of the text is controlled by the Rotation slider. Changing this value rotates the entire text around the center of the circle, allowing you to position the start and end of your text at any angle you desire.
Is this tool safe to use for commercial projects?
Yes, it is. The fonts available in the tool are all sourced from Google Fonts and are licensed for both personal and commercial use. The images and CSS you generate are yours to use without restriction.
What is the difference between the Radius and Size settings?
The Radius controls the size of the invisible circle that your text wraps around. It dictates how tight or wide the curve is. The Size setting controls the physical size of the font itself, independent of the curve.
Can I use this tool to create a full circle of text?
Absolutely. By using the “Full Circle” preset or adjusting the radius, font size, and text length, you can make the text wrap 360 degrees to form a complete ring. This is a popular style for badges and stamps.
Does the tool support all Google Fonts?
No, the tool features a curated list of fonts that are known to render well when curved. While it doesn’t include the entire Google Fonts library, the available options are versatile and cover most common design needs, from modern sans-serifs to classic serifs.
Why is my text not appearing on the canvas?
The most likely reason is that the text input field is empty. If the tool has no characters to draw, the canvas will remain blank. Ensure you have typed your desired word or phrase into the “Text” field.